
The “L” of the LAMP stack is achieved by instantiating an Ubuntu
server on the Azure platform. By and large this process is
straight-forward and follows the Azure provided instructions. As this is
documented in Microsoft documentation, this will not be reproduced
here.
In our tests, we chose an Ubuntu 18.04 image and
deployed it on a Standard B1ms (1 vcpus, 2 GiB memory) virtual machine.
We chose the B1ms VM because the B-series VMs seem to provide “burstable
performance” (Shimanskiy & Hughes, 2020). Here is an excerpt of the
Microsoft Document on the B-series VMs:
 |
Part of the challenge of using the Azure platform is that we had to be very deliberate in the chosen specifications relating to VMs as these decisions will have financial impacts. Azure offers various sizes of General Purpose, Compute-Optimized, Storage-Optimized, Memory-Optimized, GPU, and High Performance Compute VMs. As our web server did not require any specific features, we stayed in the General Purpose realm.
This VM was made in its own subnet and for a better view of where it sits in the network topology shown below. For Detail, Topology please comment your email.

Once the VM was created, we used the SSH protocol to connect to the machine. Here is the command we used at the terminal:
ssh capstone@20.43.24.111
After connecting with our credentials, we installed Apache 2 and PHP 7.2 with the following commands (How to Install Lamp Stack, n.d.):
sudo apt install apache2
sudo apt-get install php7.2-cli
To check the Apache installation, we queried the Apache service with this command:
sudo service apache2 status

 |
Also, note that when the VM is provisioned, the default rule is to allow all SSH connections. In order to control accepted SSH connections, this “Allow Any” rule was changed to only allow SSH connections from specific public IP addresses.
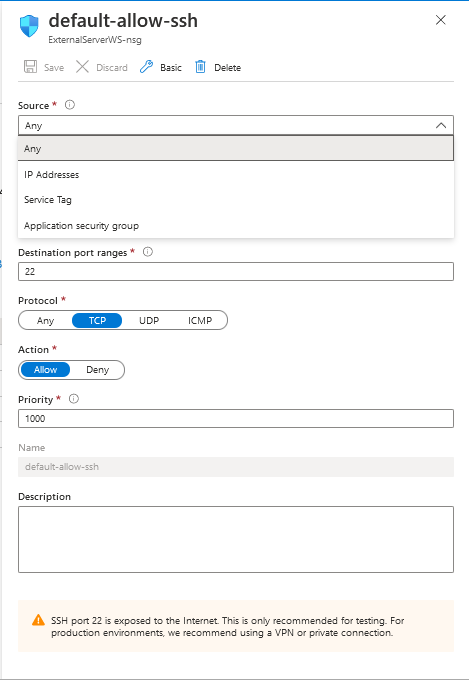
In the “Source” drop down menu, “IP Addresses” was selected. This created a new field where we could type in our public IP addresses.

For the sake of privacy, we will not show the altered rule with our own public IP addresses. This process is the same for Windows VMs where the default RDP configuration is to “Allow All” as well.
After checking the port rules, we can try to access the web server from a web browser:

NB: This screen capture was done on a test machine with a different public IP address. This will apply to all subsequent screen captures in this section.
We can see that the Apache web server is running.
To test if the web server is able to serve up web pages, we created a test file to display php information. To do this, we created a file in /var/www/html with the in-built nano editor:
In the file, we invoked the phpinfo() function:
phpinfo();
?>
Then we navigated to the file path http://20.43.24.111/info.php to see if the web server would return the appropriate page:
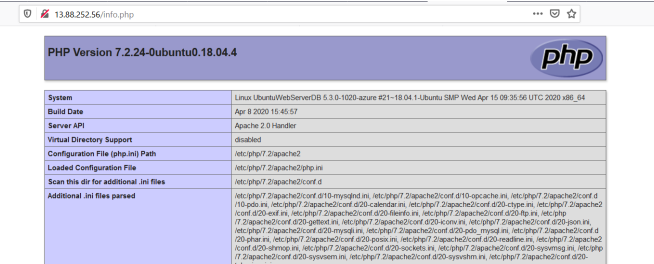
We can see that the web server indeed returned the phpinfo file.
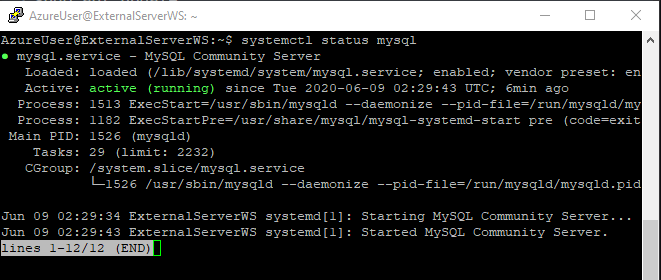
Next, we installed the MySQL database with the following command (Simic, 2018), (How to Install MySQL, 2019):
To check the MySQL installation, we queried the service’s status with the following command:
While the database can be administered from the command line, this is a skill unto itself. For instance, below, we logged in as the root user and displayed all the user accounts (How to Manage MySQL, 2019). Administering the database from the command line will require learning the language and queries, which can be done but requires time.
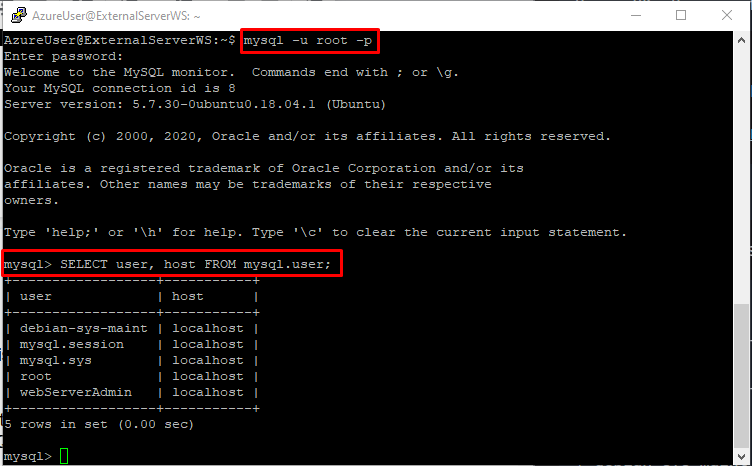
For this reason, for our tests, we installed a tool, known as phpMyAdmin, that can be used as a frontend control panel to manage the MySQL database.
From the command prompt, we used the package manager to install phpMyAdmin:
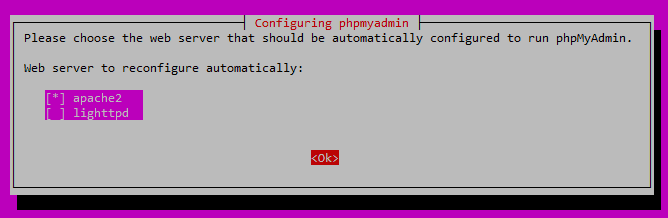
After installing the tool, the package configuration screens will be presented (Nicholson, 2019), (How to Install phpMyAdmin, 2019). Here, we selected “apache2”:
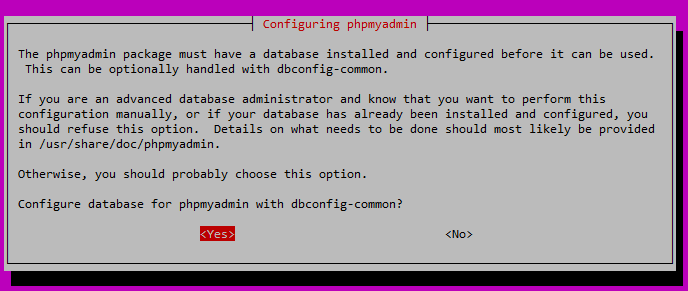
As we have no particular manual configurations that need to be done, we selected “Yes”:
Next, we provided the password to our administrative account:

The phpMyAdmin application will also require a password as well.

Once the installation process was completed, we restarted the web server:
After installation and configuration, we can find the phpmyadmin.conf configuration file in /etc/apache2/conf-enabled:

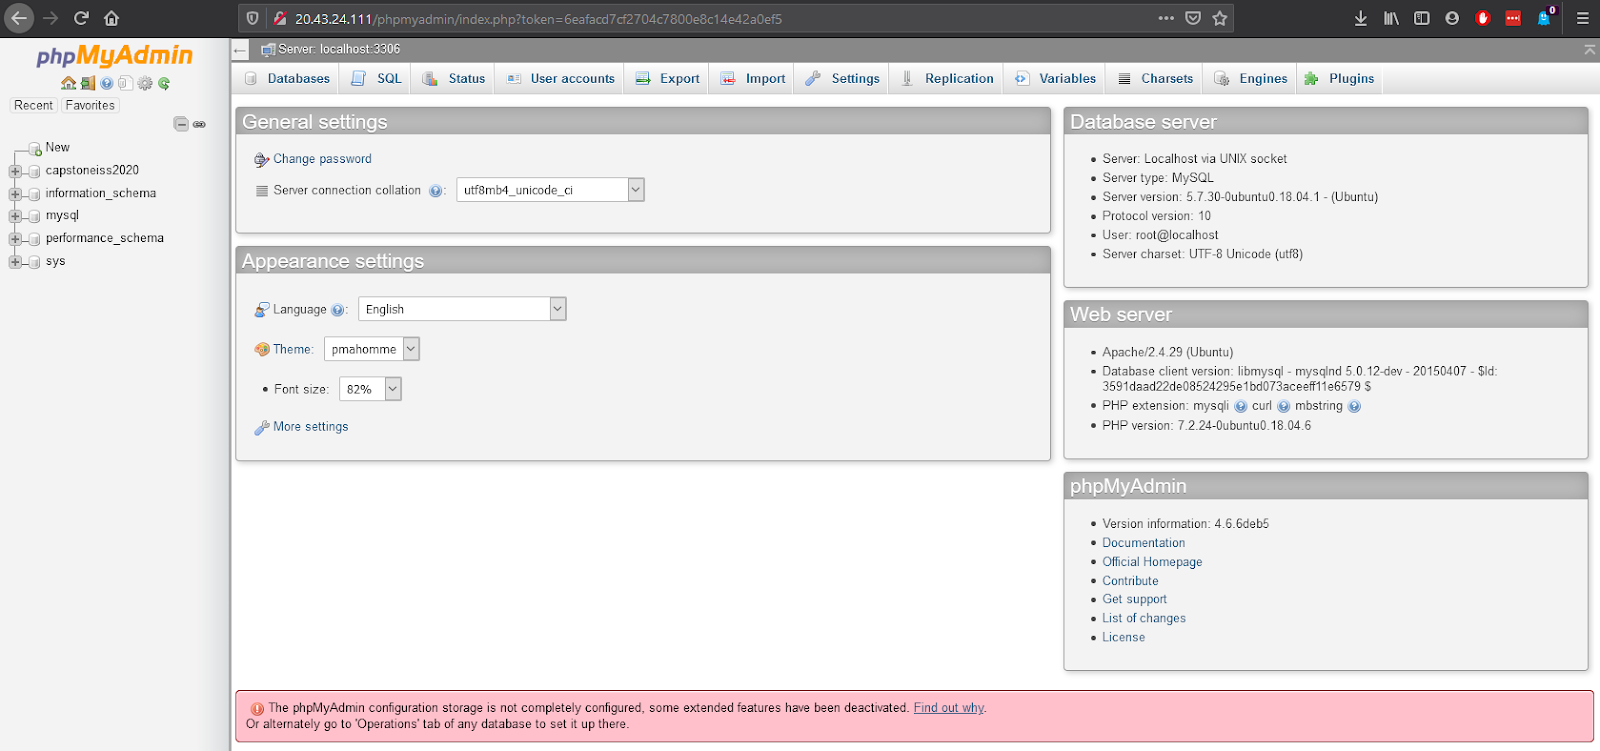
Now, when we navigate to the file path: https://20.43.24.111/phpmyadmin, we can access the management interface:

When we log in with our credentials, we can administer the database with a graphical interface:
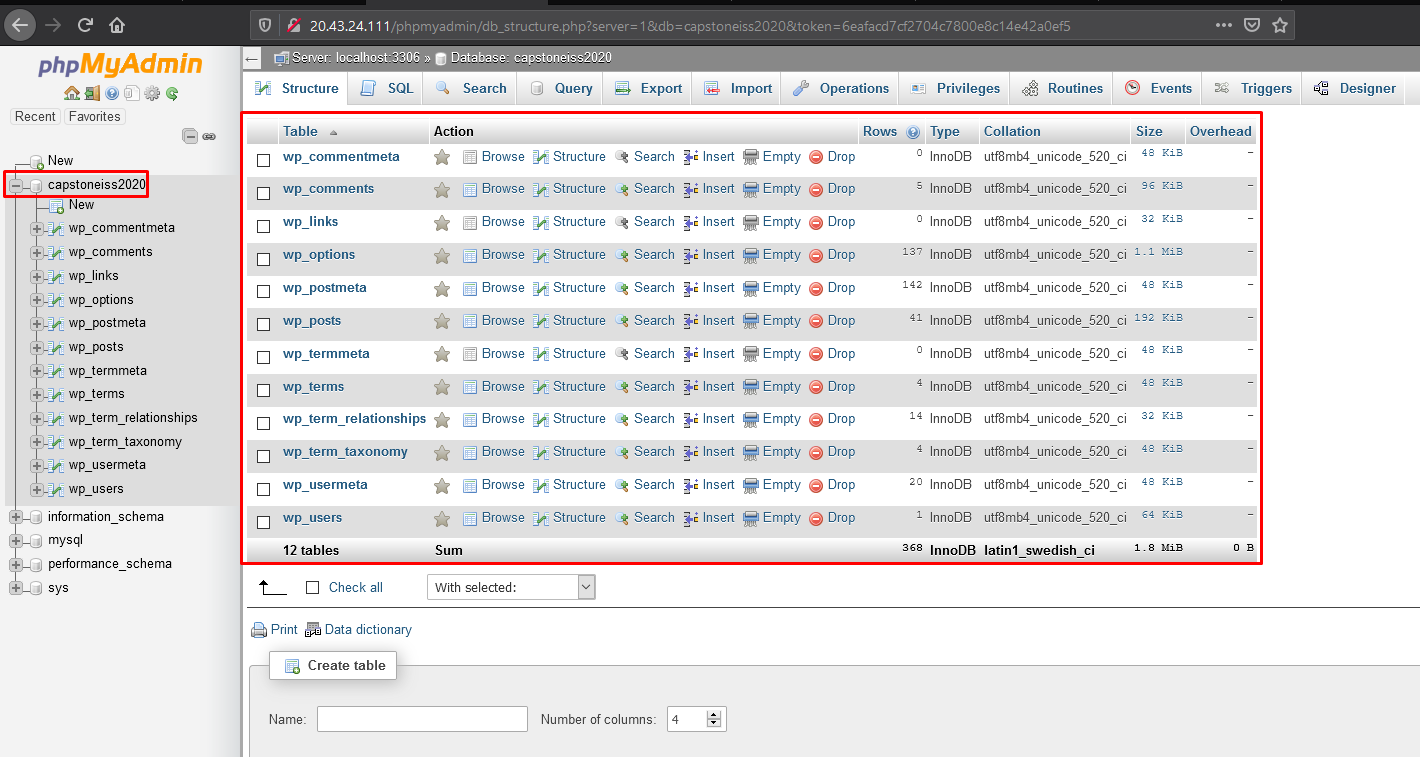
Here is another view:
Now that we know the web server is working and the database is running, we can move onto choosing and installing a content management system. While the security issues with Wordpress are well documented, it remains one of the most widely used open-source content management systems (How to Install WordPress, 2019). For this reason, we chose to use it for our test webpage.
On the server VM, we used wget to retrieve the latest version of Wordpress:
As this is a compressed file, we will untar it to the variable data directory under root:
When we navigate to the web server again, we were met with this configuration page where we configured Wordpress to connect to our database:
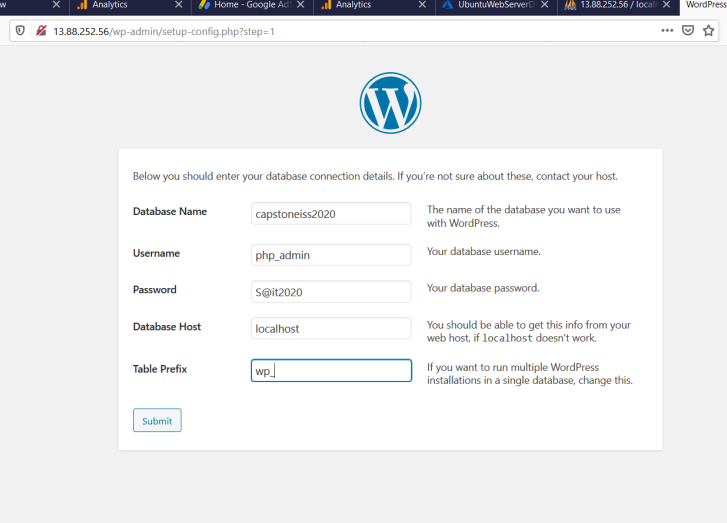
We entered the corresponding MySQL database details. As the database is in this VM and not on a separate machine, under the “Database Host” field, we specified “localhost”.
After we submitted these details, we were given a Wordpress configuration file to create.

After creating the file, we selected “Run the installation”. The VM was then restarted so the changes could take effect.
Then, when we navigated to the webpage again, we were met with a Wordpress installation page where we specified the webpage’s site title and other details:

Finally, when we navigate to the public IP address of the Wordpress site, we are met with the webpage’s user interface:

As the screenshots thus far were taken from our test device, here is the Overview tab of the External Server VM that we made on our dedicated project account. From this Overview tab, we can see that the public IP address assigned to it is 20.43.24.111.

When we navigate to this public IP address, we can see the configured Wordpress site:

Author:
Charvik Patel
Carmen Wong
Gordon Bazinet
Comments
Post a Comment
Thanks